How to Sharpen Scissors at Home: Foil, Toothpaste & More
Every kitchen drawer has at least one pair of scissors that saw better days. Dull scissors don’t just slow you down — they crush rather than cut, leaving ragged edges on paper, fabric, and everything in between. The good news is you probably already have what it takes to bring those blades back to life.
Common household methods: Aluminum foil, toothpaste, salt · Professional approach: Sharpening stone or scissor sharpener · Quick hacks featured: Coin, screwdriver, jar of salt
Quick snapshot
- Foil, toothpaste, and salt work for mild dulling (Cookist editorial team)
- How long results last; effectiveness on specialty scissors
- Social media hacks predate 2023; few rigorous comparisons exist
- Heavy-duty scissors still need professional sharpening (BudgetLightForum contributor)
The table below consolidates specific measurements and tool recommendations pulled from tutorials and forum discussions across the scissor-sharpening space.
| Fact | Value | Source |
|---|---|---|
| Top hack | Aluminum foil cutting | Homeys Tools for Life blog author |
| Recommended cuts | 15–20 | YouTube – Sharp as New |
| Foil piece length | 20 cm | Homeys Tools for Life blog author |
| Bevel angle target | 22.5 degrees | BudgetLightForum contributor |
| Pro tool | Sharpening stone (dry use) | Cookist editorial team |
| Salt amount | 2 spoonfuls | YouTube – The Salt Trick |
| Quickest claim | Coin in seconds | YouTube Shorts – EASY HACK |
The implication: most DIY methods align on specific numbers, but the consensus breaks down when estimating durability of results — forum skeptics and social creators diverge sharply on how long a foil-cut edge holds up.
How Can I Sharpen My Scissors at Home?
Most home-sharpening methods rely on friction and mild abrasives to realign or polish blade edges. The advantage is clear: no trip to the hardware store, no specialized tools, and results in under five minutes. The trade-off is that these hacks work best on scissors that are mildly dull from normal household use — scissors that have been heavily abused may need actual material removal, which DIY methods rarely achieve.
Basic Steps for Home Sharpening
- Clean the blades with warm water and soap; dry thoroughly
- Apply your chosen abrasive material (foil, toothpaste, or sandpaper)
- Open the scissors and make 10–20 cutting motions
- Wipe blades clean and test on folded paper or plastic bag
The key is consistent motion and light pressure. Forcing the cuts won’t sharpen faster — it risks damaging the bevel angle that gives scissors their cutting power.
These methods excel at honing — straightening a folded edge back into position. True sharpening, which removes metal to create a fresh edge, typically requires a proper sharpening stone or professional service.
Tools Needed or Not
For aluminum foil and toothpaste methods, you need nothing beyond what sits in your kitchen. The ceramic mug method requires an unglazed mug rim, which most stoneware provides. Professional tools like a sharpening stone or pull-through sharpener offer more reliable, durable results but represent a small investment.
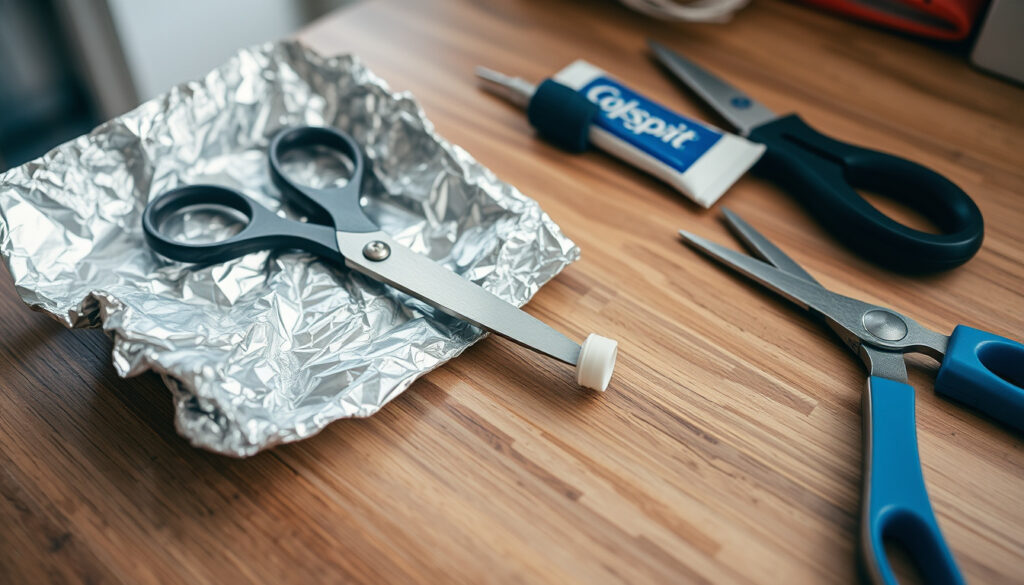
Does Cutting Aluminum Foil Sharpen Your Scissors?
Cutting aluminum foil is arguably the most popular social-media scissor-sharpening hack, with YouTube Shorts and Facebook posts routinely showing the technique in under a minute. The logic sounds straightforward: dragging blade edges across folded aluminum creates friction that realigns the metal. In practice, results are mixed.
How to Do It Step-by-Step
- Fold a 20 cm piece of aluminum foil lengthwise several times into a thick strip (Homeys Tools for Life blog author)
- Cut through the folded strip 15–20 times with both blades simultaneously (YouTube – Sharp as New)
- Wipe blade residue with a damp kitchen towel
- Test on folded paper — sharp blades slice cleanly without bending the paper
Does It Really Work?
According to forum discussions on BudgetLightForum, the aluminum foil method primarily hones rather than sharpens. The blades may appear shinier, but that doesn’t necessarily translate to better cutting performance. One contributor put it bluntly: “There is no material out there that you can cut with scissors that is going to sharpen them.”
Foil cutting works best as a quick refresh for scissors that have lost their edge within the past few days of use. For scissors that have been dull for weeks, the method delivers less noticeable improvement — the blades are already past the point where friction honing can help.
That said, some users report that foil cutting can remove light surface rust while restoring a functional edge (YouTube – Sharp as New). One YouTube creator claims foil effectiveness is “almost the same as using a wet stone for short-term household use since scissors only need a few days to become dull.” Take that claim with a grain of salt — it’s not backed by controlled testing.
Does Toothpaste Sharpen Scissors?
The toothpaste hack has a slightly stronger scientific basis than foil. Most toothpaste brands contain mild abrasives — typically baking soda or hydrated silica — that can polish metal surfaces. The theory is that rubbing these abrasives against scissor blades smooths out minor nicks and imperfections.
Application Method
- Squeeze a generous dollop of regular white toothpaste onto both blade edges
- Include the inner beveled edges where the blades meet
- Open and close the scissors several times to work the paste into the metal
- Wipe clean with a paper towel, rinse with dish soap if needed, then dry thoroughly (YouTube – The Salt Trick)
One video creator claims the process can restore “brand new” cutting power in about one minute. That’s likely an overstatement, but toothpaste does provide a gentle polishing action that foil lacks.
Results from Social Tests
Facebook videos and YouTube tutorials show scissors cutting through paper and plastic after toothpaste treatment. One YouTube video demonstrates the method on the dullest household scissors, claiming it works “using household items without tools.” Visual results in these videos are suggestive but not conclusive — no controlled before-and-after sharpness measurements are shown.
Toothpaste is a mild abrasive polish, not a true sharpening agent. It works best when blades have minor dulling from normal use and need a surface polish rather than edge reconstruction.
How to Sharpen Scissors at Home Without a Sharpener?
Beyond foil and toothpaste, several household items can create the friction needed for scissor honing. These methods are particularly useful when you need results fast and don’t have a sharpening stone handy.
Using Salt or Coin
- Salt method: sprinkle 2 spoonfuls of coarse salt on the unglazed rim of a ceramic mug (YouTube – The Salt Trick). Open the scissors and slide each blade top-to-bottom against the rim, repeating several times per side.
- Coin method: reportedly, some users insert a coin between the blades and “cut” through it with a rocking motion, though this is less documented than other methods
The ceramic mug method is arguably the most effective DIY alternative to foil, according to forum consensus on BudgetLightForum. The unglazed stoneware provides a honing surface similar to a sharpening stone, while the salt adds controlled grit.
Screwdriver Technique
Social media posts mention running scissors along a screwdriver shaft as a quick edge adjuster, but documentation is sparse. This method reportedly works best for minor realignment rather than significant sharpening. If you try it, use a screwdriver with a smooth shaft and apply light pressure while opening and closing the scissors.
No-tool methods trade reliability for convenience. A sharpening stone or pull-through sharpener like a Fiskars system will produce more consistent, longer-lasting results — but only if you have one on hand. For the occasional touch-up, household items get the job done.
How Do Hairdressers Sharpen Their Scissors?
Professional hairdressers treat scissors as precision instruments, and their sharpening approach reflects that. Unlike household scissors, professional shears often feature convex blades made from high-carbon steel, and they require specific angle maintenance to preserve cutting performance.
Professional Tools Like Stone
- Sharpening stone: professionals often use a fine-grit sharpening stone in a dry condition, applying light strokes that mirror the existing bevel angle (Cookist editorial team)
- Pull-through sharpeners: devices like the Fiskars pull-through sharpener offer a guided angle that prevents over-grinding (BudgetLightForum contributor)
- Professional services: many hairdressers send scissors out for professional sharpening every 6–12 months, depending on usage volume
The target bevel angle for most scissors is approximately 22.5 degrees, according to forum guidance on BudgetLightForum. A simple trick: fold a piece of paper to create a 22.5-degree angle and use it as a reference when sharpening.
10 Professional Ways to Keep Scissors Sharp
- Separate the blades before sharpening to access both edges equally
- Use sandpaper with 200 grit as an alternative to foil — cut through it the same way (Cookist editorial team)
- After honing, strop the blades on a brown paper bag or cardboard to polish them further
- Clean blades after every use to prevent residue buildup
- Store scissors in a protective case or with the blades closed
- Avoid using scissors on non-recommended materials (cardboard, tape, wire)
- Check the pivot screw periodically and tighten if loose
- Have scissors professionally serviced annually for high-use scenarios
- Use a ceramic rod or pull-through sharpener if available
- Test sharpness regularly using folded paper or a plastic bag
Household scissors and professional shears are built differently. Attempting to sharpen convex-blade professional shears with a DIY method can ruin the bevel geometry. If your scissors cost more than $50 per pair, skip the home hacks and invest in professional servicing.
Step-by-Step: The Salt-and-Ceramic Method
The salt-and-ceramic combination is reportedly one of the most effective DIY sharpening approaches, combining grit from salt with the honing surface of unglazed stoneware.
- Gather materials: 2 spoonfuls of coarse salt, an unglazed ceramic mug or bowl, and your dull scissors
- Sprinkle the salt evenly across the unglazed rim of the mug
- Open the scissors fully and hold them at a comfortable angle
- Place one blade against the rim and slide it top-to-bottom in a smooth motion
- Repeat 8–10 strokes on the first blade, then do the same on the second
- Wipe the blades clean with a paper towel
- Rinse with dish soap and water if residue remains, then dry thoroughly
- Test by cutting a folded plastic bag or paper — sharp blades slice without bending or tearing
This method reportedly restores cutting power in minutes without professional service, according to Cookist editorial team. Results vary depending on how dull the scissors were to begin with.
Confirmed Facts vs. What’s Unclear
Confirmed facts
- Foil and toothpaste are popular on social media and in DIY circles (Cookist editorial team)
- The ceramic mug method is preferred over foil for reliable honing (BudgetLightForum contributor)
- These methods work best on household scissors with mild dulling
- Sharpening stone use reportedly requires mirroring the bevel angle (Cookist editorial team)
What’s unclear
- How long sharpened results last before needing reapplication
- Whether these methods work equally well on all scissor types (steel vs. titanium blades, left-handed vs. right-handed)
- Whether toothpaste brands with whitening or gel formulas perform differently than standard white toothpaste
- Actual statistical success rates — most claims are anecdotal
What the Experts Say
Toothpaste contains mild abrasives (like baking soda or silica), which help polish and smoothen the blades.
Cookist editorial team
There is no material out there that you can cut with scissors that is going to sharpen them.
BudgetLightForum contributor
The friction of the metal foil and the metal blade sharpens the blade.
Homeys Tools for Life blog author
The contradiction between these sources highlights the core tension in DIY scissor sharpening. Social-media creators and DIY bloggers promote the methods with confidence, while some forum participants remain skeptical about whether cutting any soft material can truly sharpen hardened steel.
Related reading: 4 Ways to Sharpen Scissors at Home · How to Sharpen Scissors at Home
Household hacks like aluminum foil that restore your scissors’ edge work equally well on knives, as detailed in knife sharpening beginners guide.
Frequently Asked Questions
What household items sharpen scissors?
Aluminum foil, regular white toothpaste, coarse salt, sandpaper (200 grit), and the unglazed rim of a ceramic mug or bowl are all commonly used for DIY scissor sharpening. Each works through friction or mild abrasion to realign or polish blade edges.
Is a sharpening stone necessary?
No, but it produces more reliable and longer-lasting results. Household methods like foil or toothpaste work best for mild dulling and quick refreshes. If you sharpen scissors frequently or own professional-quality shears, a sharpening stone or pull-through sharpener is worth the investment.
How often should I sharpen scissors?
It depends on usage. Household scissors used daily may need refreshing every few weeks. Professional hairdressers typically sharpen every 6–12 months with professional services, while between sharpenings they use honing tools like ceramic rods.
Can I sharpen fabric scissors the same way?
Fabric scissors (often called shears) have a specific bevel angle optimized for cutting cloth. Using DIY methods risks altering that angle and reducing cutting performance. Fabric scissors are best sharpened by professionals who understand the specific geometry.
What if my scissors are very dull?
Heavy dulling — where scissors crush rather than cut even soft materials — often means the blade edge is too rolled or damaged for friction methods to fix. At that point, a sharpening stone with proper angle technique or professional service is the better choice.
Are there risks to DIY sharpening?
Yes. Over-sharpening can remove too much material, ruining the bevel geometry. Using excessive pressure can crack or chip blade edges. For expensive or precision scissors, the risk of permanent damage outweighs the convenience of DIY methods.
How to test if scissors are sharp?
Cut through a folded plastic bag or piece of paper. Sharp scissors slice cleanly with smooth motion — no bending, tearing, or crushing. Dull scissors force the material through rather than cutting it, leaving ragged edges.
More related posts
 Lauren Compton: Career, Personal Life, and Rise to Fame
 Georgia Nicols Horoscope Today – Daily Predictions for Your Sign
 Best French Bakeries Near Me – Top Cincinnati Ratings & Hours
 6/8 Time Signature Songs: Examples, Counting & Popular Tracks
 Josh Brolin: Health, Arrest, Family & His Most Famous Role
 Isaiah Thomas vs Isiah Thomas: Comparison and Health
 Gilded Age Season 3: Release, Cast, Episodes & Season 4
 Kaiju No. 8 Season 2 – Release Date, Episodes, Crunchyroll Guide
